 Optimizes probiotic potency
- Boosts nutrient retention
- Reduces oxidation
- Maximizes a digestive healing program (i.e., AIP or GAPS)
- Maintains flavor and texture
- Reduces pathogenic mold or off-flavors
- Longer-term storage (garlic and kraut can easily keep for a year or longer)
- Optimizes fridge or cold storage space
This article is specific to storing ferments after the active fermentation stage is complete. If this sounds like a foreign language, I would suggest reading “Required Reading for the Ferments Section” in my book.
My 4-Step Approach to Ferment Storage
1. Container
Materials do matter. Ideally, an airtight (anaerobic) container that allows the ferment to release excess fermentation gases is optimal. Be sure to choose glass over plastic. I would strongly advise against storing live culture ferments in plastic containers due to the potential leaching of chemicals. Also avoid air/light permeable materials. If you buy ready-made cultured food, transfer it to an airtight glass container.
Probiotics, vitamins, minerals and enzymes are all optimally preserved with minimum exposure to air.
Choosing the best option is more critical for longer storage. For example, if you are taking a ferment along for lunch or a potluck, then a small Fido jar or even a mason jar is fine. But if you want take advantage of the 8 Reasons Why Storage Matters, then the Probiotic Jar is the better option. I’ve had kraut and garlic keep perfectly for over a year in a Probiotic Jar.
Note: If you are focusing on a digestive healing protocol to recover from a compromised system, then special care choosing a container may be a vital component. In this situation, I would highly recommend sticking to the top two options in the list below, or you may consider the third in a pinch.
I’ve ranked this list from Optimal to O.K. based on my research and experience.
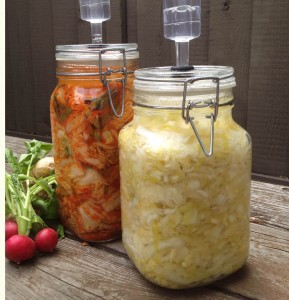
- Probiotic Jar with airlock (Try the short airlock for easier fridge storage)
- Probiotic Jar with stopper
- Fido jar or other wire-bail jar (available on Amazon, Sur La Table, Crate and Barrel and the Container Store)
- Glassware or jars with a tight-fitting lid*
*These are not airtight but may be an option for travel or a day or so in the fridge
2. Container Size
Choose a size where the airspace is minimized. As you use the ferment, I recommend moving the contents to a smaller jar to keep the airspace at 25% or less as you consume the ferment. Fermentation never stops, and the Lactic Acid Bacteria (LAB) are sensitive to air. This is also a good practice to optimize nutrients and shelf life of fresh prepared foods too.
Less Airspace = More Lactic Acid Bacteria
Continue to transfer the ferment to a smaller-sized container to minimize the head or airspace between the top of the ferment and the lid. Always use a clean utensil when serving from the jar. Double dipping (aka reusing a utensil that has been in contact with your mouth) can introduce icky and/or pathogenic bacteria. If you have leftovers from serving a ferment at a meal, then save this portion in a separate container rather than returning it to the original container.
3. Light and Temperature
Lactic acid bacteria and enzymes thrive in darkness. Be considerate and give them privacy to multiply and do their work. The fridge light is not an issue unless you hang out with the door open. For basements or cellars, choose a spot away from direct light and simply wrap a dish towel around the jar (leaving the airlock to stick out).
Ferments are temperature sensitive. Your fridge is fine for cold storage but if you are choosing a basement or cellar, 32°F to 50°F is recommended. Minimize the time your jar is out at room temperature before serving. I recommend serving the quantity to be eaten on a separate plate and returning the jar to the fridge.
Consider freezing your ferments if you are running low on fridge or cellar space. Freezing maintains approximately 90% of the LABs.
4. Burping or Off-Gasing
Ferments are living foods and continue to produce CO2 and other fermentation gases in cold storage (albeit at a much much slower rate than when actively fermenting).
- If you are using an airlock with water, then the jar is automatically burped. Remember to check the water level in the airlock for evaporation and refill as needed.
- If you are using the stopper, remove and quickly replace the stopper. Alternatively, if you find the stopper has popped off in the fridge, then you may have waited too long to burp the jar. But now you get to play a family favorite: “find the stopper in the fridge.” If the stopper popped off in the fridge and you catch it on the same day, it’s still ok to consume. If it’s been longer or you can’t tell, then I would likely discard it.
- If you are using a regular Fido jar, then open and close the lid. The frequency of this will depend on the contents of the ferment and is somewhat difficult to predict. If you hear a swoosh sound or feel a release of pressure, then a burp was probably needed. This is why I generally default to using a short airlock in the fridge so I have one less thing to monitor.